Software Support
Compatibility & Installation
Our new communication software is easy and straightforward to install. AP Connect works on Windows and Mac without the need for any extra software.
Windows Vista, 7, 8 & 10
Mac OSX 10.9+
For a quick start guide to installing AP Connect on Windows or Mac, click the MORE link below.
Installing AP Connect on Windows
- Ensure you have downloaded the most recent version of AP Connect from our site.
- Once downloaded open your Windows Downloads folder and double-click on APConnect.exe.
- You will then be prompted to agree to our Software User Agreement before. Click next.
- After the User Agreement, you will be taken through various stages of the installation. Each stage is fully described within the software.
- Once you have completed the installation process, you can launch AP Connect from All Programs within the Start Menu. Alternatively, if you have chosen to add a shortcut to your Windows Desktop, you will see an AP Connect icon
 which you can use to launch the software
Installing AP Connect on Mac OSX
- Ensure you have downloaded the most recent version of AP Connect from our site.
- Once downloaded open your Mac Downloads folder and double-click on APConnect.dmg.
- You will then be prompted to agree to our Software User Agreement. Click Next.
- A new window will open with a picture of the AP Diving logo and next to it, a picture of your Applications Folder. To install simply drag the AP Diving logo into your Application Folder. Note: You may be asked to enter your Mac password to complete the installation.
- Once AP Connect has finished copying to your Applications Folder, double click the AP Connect icon
 to launch the software.
Connection via Bluetooth
On Windows
- Either switch on your Computer’s Bluetooth or install the Belkin Bluetooth adapter on your PC using the CD and instructions provided in the Bluetooth USB adapter packaging. If your computer does not have a CD/DVD drive then the driver can be downloaded from Belkin’s website: http://www.belkin.com/uk/support-article?articleNum=4867. If that link is out of date, simply go to www.belkin.com and search for “Bluetooth USB Adapter F8T065 - Setup Driver”.
- Move the handset to within 2 feet of the computer. With the handset switched off, activate the Bluetooth mode on the handset by pressing and holding, for 2 seconds, both the left and centre buttons.
- Click Start > Devices and Printers > Add a Device.
- Double click the new Bluetooth handset – AP Vision-XXXX
- This will pair the handset and it will now be displayed in the ‘Devices' of the Devices and Printers
- Allow 20-30 seconds for Windows to install the required drivers to communicate with the handset.
- Once connected and installed, open AP Connect and click Search. The software will now search for your connected handset and establish a connection.
Note: the handset will stay in Bluetooth mode for only 2 minutes. If the following steps take longer to perform, simply re-activate the Bluetooth mode by pressing and holding the left and centre buttons again.
On Mac
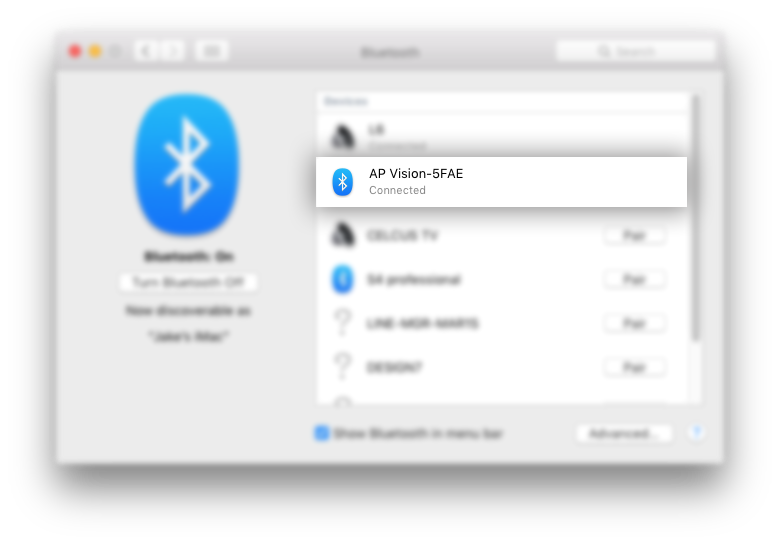
- Switch on your Mac's Bluetooth: System Preferences > Bluetooth > Turn Bluetooth On
- Move the handset to within 2 feet of the computer. With the handset switched off, activate the Bluetooth mode on the handset by pressing and holding, for 2 seconds, both the left and centre buttons.
- Ensuring your handset is still in Bluetooth Mode, your Mac will now search for nearby bluetooth devices. You will see your handset appear in the list as AP Vision-XXXX. Click Pair to connect the handset to your Mac.
- After a few seconds of "Connecting" the handset will successfully connect to your Mac.
- Open AP Connect and click Search. The software will now search for the connected handset and establish a connection.
Note: the handset will stay in Bluetooth mode for only 2 minutes. If the following steps take longer to perform, simply re-activate the Bluetooth mode by pressing and holding the left and centre buttons again.
Connection via USB Bridge Interface
Windows / Mac
- Connect your lid handset to your computer via the USB Bridge Interface Cable [sold separately]
- Enable PC LINK on your handset by pressing and holding the left button until PC LINK
- Open AP Connect and click Search - The software will now scan for your connected handset and notify you when discovery is successful.
Note: the handset will stay in Bluetooth mode for only 2 minutes. If the following steps take longer to perform, simply re-activate the Bluetooth mode by pressing and holding the left and centre buttons again.
Downloading Dives
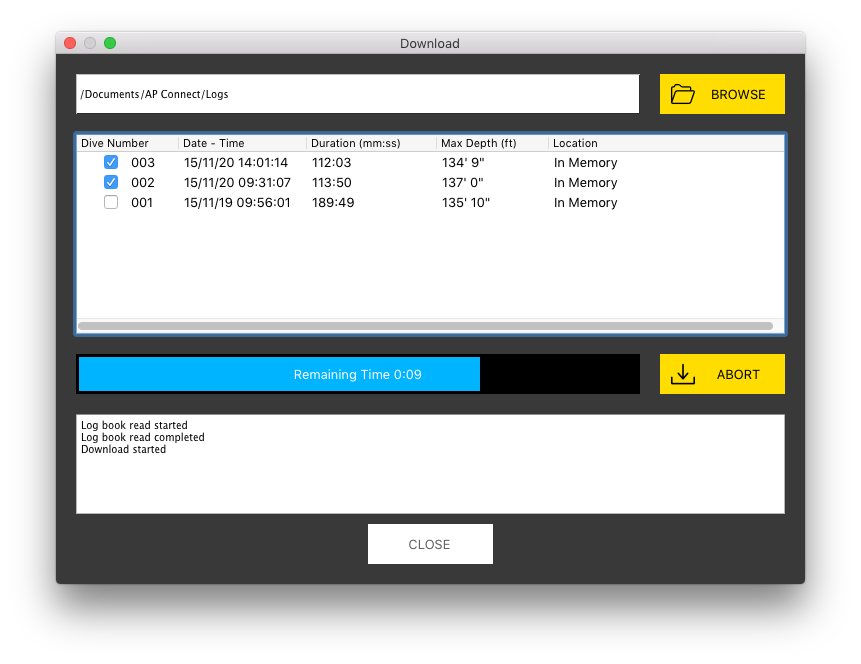
- Ensure your device is connected.
- Click Download from Device to list Dive Logs stored on your device.
- Select Browse to select an appropriate directory to store the dive logs.
- Select the dives you wish to download.
- Click Download and the files will begin downloading to the directory selected.
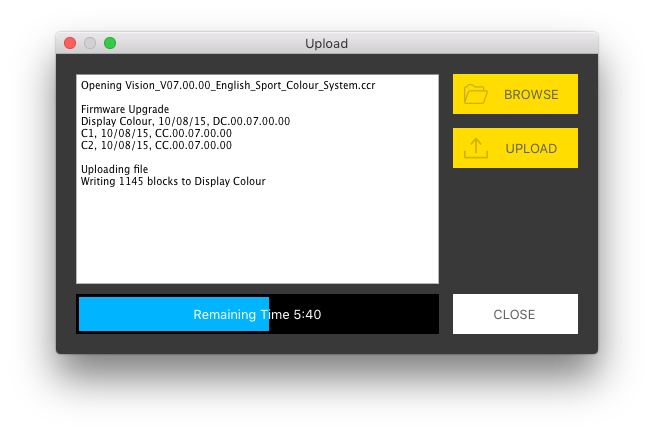
Upgrading Firmware
- Ensure your device is connected.
- Click Upload to Device
- Select Browse to select the appropriate directory that contains the software file to be uploaded.
- Select the file(s) you want to upload
- Click Upload and the file will begin uploading.
- After the upload has finished, turn off the handset.
- Turn the device back on by pressing and holding the left button and inspect the splash screen to confirm that the new software version has been uploaded.
Looking for the latest Handset Firmware? Click Here
